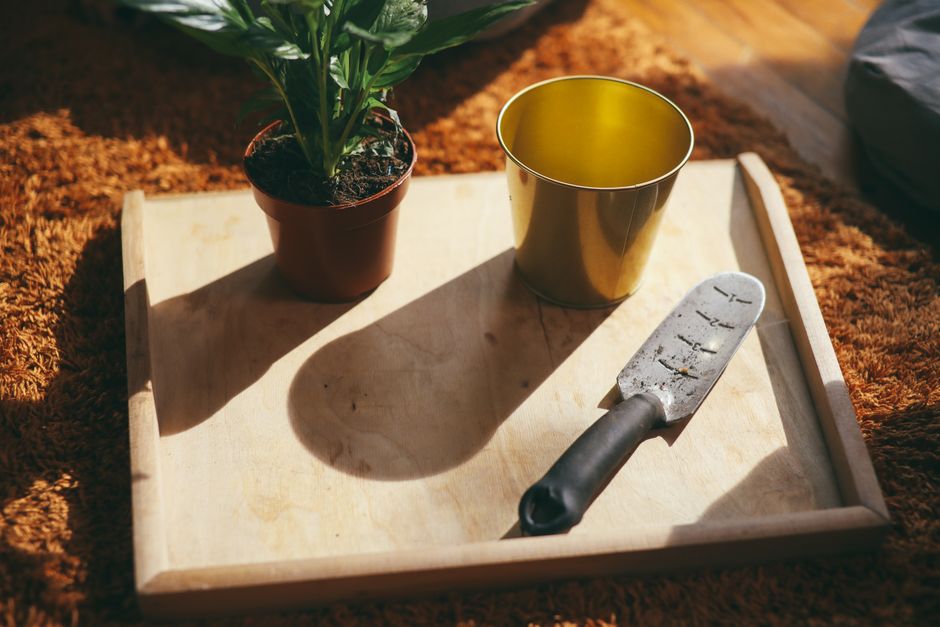
Build a DIY Self-Watering Planter for Indoor Plants
Tired of forgetting to water your indoor plants or struggling to keep them consistently hydrated? A DIY self-watering planter is a fantastic solution for home growers. This clever system provides a steady supply of water to your plants, making it easier to maintain a thriving indoor garden, especially in small spaces or for those with busy schedules. It’s a budget-friendly way to ensure your green friends get the moisture they need without constant attention from you.
Why Should You Build a DIY Self-Watering Planter?
Building a DIY self-watering planter offers numerous benefits for both your plants and your peace of mind. The main advantage is consistent moisture delivery to your plant's roots, which helps prevent both overwatering and underwatering, two common killers of indoor plants.
With a self-watering system, your plants absorb water as they need it, leading to healthier root development and more robust growth. This method saves you time because you do not need to water daily or even every few days. You simply refill the reservoir less frequently.
It is also a highly efficient way to use water, reducing waste and making it an environmentally friendly choice. For small apartments or desks, these planters are perfect because they are often compact and mess-free. You will not have water spilling out onto your surfaces.
What Materials Do You Need for a DIY Self-Watering Planter?
Creating a simple self-watering planter requires just a few basic items, many of which you might already have around your home. You will need two containers, one that fits inside the other, plus a wicking material to draw water up to your plant's soil.
- Two Plastic Containers: Choose one container for your plant (the inner pot) and one slightly larger container to hold water (the outer reservoir). Clear plastic soda bottles or food containers work well for this. The inner pot needs drainage holes, while the outer reservoir needs to be watertight.
- Wicking Material: This is crucial for drawing water from the reservoir to the soil. Natural fibers like cotton rope, felt strips, or even old cotton T-shirt strips are excellent choices.
- Potting Mix: A good quality, light potting mix designed for indoor plants is ideal.
- Scissors or Utility Knife: For cutting plastic and wicking material.
- Drill or Sharp Object: To create drainage holes if your inner pot does not have them.
- Your Favorite Plant: A small herb, a houseplant, or even microgreens can thrive in this setup.
Always wash your containers thoroughly before use to ensure no food residue or chemicals harm your plants.
How Do You Build a Simple Self-Watering Wicking Planter?
Building a self-watering wicking planter is straightforward and can be completed in a few easy steps. This method is effective and perfect for beginners looking to improve their indoor gardening.
-
Prepare the Inner Pot: Take your smaller container. If it does not already have drainage holes, use a drill or a sharp object to create several small holes in the bottom. These holes are where the wick will pass through and where excess water can drain.
-
Prepare the Outer Reservoir: Your larger container will serve as the water reservoir. Make sure it is clean and watertight. There is no need for holes in this container.
-
Cut and Insert the Wick: Cut a length of your chosen wicking material. It should be long enough to reach from the bottom of the outer reservoir up into the soil of your inner pot. Thread one end of the wick through a drainage hole in the inner pot, leaving about an inch or two inside the pot and the rest hanging down.
-
Add Soil and Plant: Fill the inner pot with your potting mix. Make sure the wick is centered and extends slightly into the soil. Plant your chosen plant into the soil, gently firming the soil around its base. Then, water the soil from the top until it is thoroughly moist.
-
Assemble the Planter: Carefully place the inner pot into the outer reservoir. The wick should now extend into the bottom of the reservoir. Pour water into the outer reservoir until it touches the bottom of the inner pot, ensuring the wick is submerged.
Wick Material Options
Choosing the right wick material is essential for your self-watering system to work effectively. Cotton rope is a popular choice due to its excellent capillary action, meaning it can draw water upwards efficiently. Strips of old cotton fabric, like T-shirts or towels, also work well and are a great way to repurpose materials.
Synthetic materials, such as nylon shoelaces, can also be used, but natural fibers often perform better due to their absorbency. Experiment with what you have on hand to see what works best for your specific setup.
Tips for Using Your Homemade Self-Watering Planter
Once your DIY self-watering planter is assembled, a few tips can help ensure its long-term success. Regular monitoring and proper maintenance will keep your plants thriving.
Keep an eye on the water level in your reservoir. Refill it when it gets low, usually every few days to a week, depending on your plant's water needs and the size of the reservoir. You will find a rhythm that works for your specific plant.
Occasionally, it is a good idea to flush the soil with fresh water from the top. This helps prevent the buildup of salts from tap water or fertilizers. You can also add a diluted liquid fertilizer to the reservoir when your plant needs feeding, but always follow the dosage instructions on your nutrient bottle. For more guidance on containers, you might find our guide on Best Containers for Small Indoor Gardens helpful, even for DIY projects.
What Plants Thrive in a Self-Watering Setup?
Many common indoor plants are excellent candidates for a self-watering planter, especially those that prefer consistently moist, but not waterlogged, soil. Herbs like basil, mint, and parsley often do very well, as do many leafy greens and microgreens.
Flowering plants such as African violets, peace lilies, and impatiens also appreciate the steady moisture supply. For vegetables, smaller varieties like cherry tomatoes or peppers can be grown successfully in a self-watering setup, provided they have adequate light. Plants that prefer drier conditions, like succulents or cacti, are generally not suited for this type of system because it can lead to overwatering for them.
Final Thoughts
Building a DIY self-watering planter is a simple, effective, and budget-friendly way to keep your indoor plants happy and healthy. This system provides consistent moisture, saves you time, and reduces water waste, making indoor gardening more accessible for everyone. Try building one today to enjoy greener, healthier plants with less effort. Explore more MicroVeg guides for additional indoor gardening tips and tricks!
Frequently Asked Questions
How often do I need to refill a self-watering planter?
The refill frequency depends on your plant's water needs and the reservoir size, but typically it is every few days to a week. Check the water level regularly and refill when low.
Can I use any plant in a self-watering planter?
Most plants that prefer consistently moist soil, like herbs, leafy greens, and many houseplants, thrive in self-watering planters. Succulents and cacti, which prefer dry conditions, are generally not suitable.
What kind of soil is best for self-watering planters?
A light, well-draining potting mix designed for indoor plants is best. It should be able to absorb and transfer moisture efficiently through the wick without becoming waterlogged.
Do self-watering planters prevent root rot?
While self-watering planters provide consistent moisture, they can help prevent root rot by avoiding overwatering from the top. However, if the soil remains constantly saturated or lacks aeration, root rot can still occur. Proper soil and wick choice are key.
Explore More DIY Setups Guides
 DIY Setups
Build Your Vertical Indoor Garden: Small Space, Big Harvests
Learn how to create a vertical indoor garden and grow more fresh food in even the smallest spaces.
 DIY Setups
Kratky Hydroponics for Beginners: Easy No-Pump Setup
Discover Kratky hydroponics, a simple, passive method for growing fresh plants indoors without pumps or electricity, perfect for beginners.
 DIY Setups
Budget Grow Tent Alternatives: DIY Small Space Solutions
Explore smart, budget-friendly grow tent alternatives for your indoor plants, perfect for small spaces and home growers.