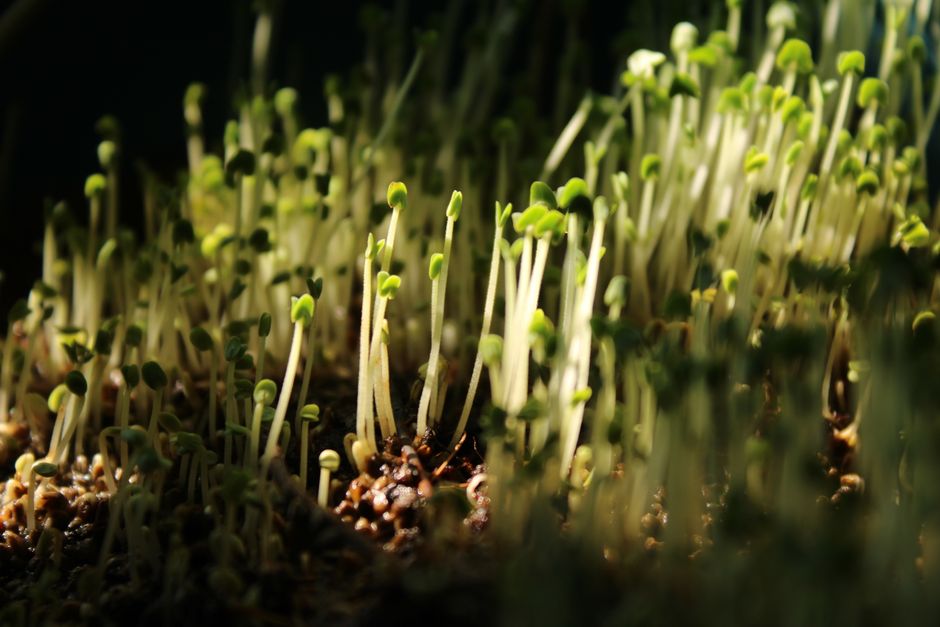
Easiest Microgreens to Grow: Your Quick Start Guide
Dreaming of fresh, homegrown greens but feel like you don't have a green thumb? You're in luck! Growing microgreens is one of the simplest ways to start an indoor garden, and some varieties are especially forgiving for beginners. The easiest microgreens to grow are those that germinate quickly, mature rapidly, and require minimal fuss, offering a rewarding harvest in just one to two weeks.
Microgreens are simply young vegetable greens, harvested right after the cotyledon leaves have fully developed, with or without the first true leaves. They are packed with flavor and nutrition, making them a fantastic addition to salads, sandwiches, and smoothies. Let's get you started on your journey to fresh, delicious microgreens!
Why Start with Easy Microgreens?
Starting with easy microgreens offers quick success, which builds confidence and provides fast, nutritious harvests without much fuss. These varieties minimize the common frustrations new growers face, making indoor gardening accessible and enjoyable from day one.
Think about it. In just 7-14 days, you can go from seed to harvest. This rapid turnaround is incredibly motivating, especially when you're just learning the ropes. Easy microgreens typically have high germination rates and robust growth, meaning you'll see visible progress daily. This immediate gratification helps new growers understand the basic principles of plant care without waiting months for a mature plant.
They are also less prone to common issues like damping off or nutrient deficiencies, which can be tricky for beginners to diagnose and fix. By choosing simple varieties, you set yourself up for a positive first experience, encouraging you to continue exploring the world of indoor gardening.
What Are the Easiest Microgreens to Grow for Beginners?
Radish, broccoli, and arugula are some of the easiest microgreens for beginners due to their quick growth cycle, high germination rates, and minimal requirements. These varieties consistently deliver a satisfying harvest in a short amount of time, perfect for a quick start.
Each of these has unique flavors and textures, allowing you to experiment even within the beginner category. They don't typically need pre-soaking, which simplifies the planting process. Their seeds are also readily available and usually quite affordable, making them a budget-friendly choice for your first indoor garden project.
Radish Microgreens: Fast & Peppery
Radish microgreens are perhaps the fastest-growing and easiest of all. They germinate in just a day or two and are ready to harvest in about 5-10 days. Their flavor is a zesty, peppery kick, similar to mature radishes but milder.
There is no need to pre-soak radish seeds. Just spread them evenly on your growing medium, cover for a few days, and then expose them to light. They are very forgiving and rarely cause problems for new growers.
Broccoli Microgreens: Mild & Mighty
Broccoli microgreens are another excellent choice for beginners. They have a mild, fresh, slightly cabbage-like flavor and are packed with nutrients. They take a little longer than radish, usually 7-14 days to harvest, but their consistent growth makes them very reliable.
Broccoli seeds are small but easy to handle. They don't require pre-soaking and grow into sturdy, vibrant green shoots. They're a staple for many microgreen growers because of their health benefits and pleasant taste.
Arugula Microgreens: Zesty & Quick
Arugula microgreens offer a distinct peppery, slightly nutty flavor that adds a gourmet touch to any dish. They are also fast growers, typically ready for harvest in 7-12 days, similar to broccoli.
These seeds are small but germinate reliably without pre-soaking. Arugula microgreens are quite resilient and adapt well to various indoor growing conditions, making them a great option for those just starting out.
How Do You Plant Beginner Microgreens for Success?
To plant beginner microgreens successfully, start with good quality seeds, a shallow tray, and a light-weight growing medium, ensuring even seed distribution and proper moisture. Following a few simple steps will give your microgreens the best start.
Here's what you'll need and how to do it:
- Materials:
- Shallow growing trays (with drainage holes and a solid bottom tray)
- Seed starting mix or coco coir (a light, sterile growing medium)
- High-quality microgreen seeds (radish, broccoli, arugula)
- A spray bottle for watering
- A light source (like a south-facing window or an LED grow light)
- Steps:
- Prepare Your Tray: Fill your growing tray with about one to two inches of moist seed starting mix or coco coir. Gently tamp it down to create a level surface, but don't compact it too much.
- Sow Your Seeds: Sprinkle your microgreen seeds evenly across the surface of the growing medium. Aim for density, but avoid clumping. For example, you want about a single layer of seeds without too much overlap. You don't need to cover these seeds with more soil.
- Mist and Cover (Blackout Period): Lightly mist the seeds with water from your spray bottle. Then, place another tray or a dome over your seeded tray to create a dark, humid environment. This is called the 'blackout period.' It encourages uniform germination. This can last for 2-4 days, depending on the seed type.
- Provide Light: Once most of your seeds have germinated and the tiny sprouts are pushing up, remove the cover. Place your tray under a grow light or in a bright, sunny window. For optimal growth, run your grow lights for 12-16 hours a day. Keep the growing medium consistently moist by misting as needed, but avoid overwatering.
For more detailed guidance on getting your indoor seeds started right, check out our guide on Indoor Seed Starting Small Space: Your Easy Guide.
When and How to Harvest Your Easiest Microgreens?
Harvest your easiest microgreens when they develop their first true leaves, usually 7-14 days after planting, by snipping them just above the soil line with clean scissors. This timing ensures peak flavor and nutritional content.
Here's a breakdown of general harvest times for our beginner favorites:
- Radish: Ready in as little as 5-10 days, often before true leaves fully emerge. Look for developed cotyledons.
- Broccoli: Typically ready in 7-14 days, when cotyledons are fully open and the first tiny true leaves might just be appearing.
- Arugula: Harvest between 7-12 days, once the cotyledons are well-formed and they're standing tall.
To harvest, use a clean, sharp pair of scissors. Grasp a small bunch of microgreens gently and snip them just above the soil line. Try to cut straight across to get an even harvest. You want to avoid pulling them out of the soil or getting too much of the growing medium mixed in with your greens.
Always wash your harvested microgreens thoroughly under cool water before eating to remove any growing medium or debris. Spread them on a paper towel to air dry or use a salad spinner. Microgreens are best used fresh, right after harvesting, but you can store them in an airtight container in the refrigerator for a few days.
What Common Problems Might You Face with Beginner Microgreens?
Common problems with beginner microgreens include uneven germination, mold growth, or leggy seedlings, which can often be fixed with proper moisture, airflow, and adequate light. Being aware of these issues helps you address them quickly.
- Uneven Germination: This usually happens if seeds are not spread evenly, if some areas are too dry, or if the seeds are old. Make sure your seeds are fresh and distributed uniformly. Keep the medium consistently moist during the blackout period.
- Mold Growth: Mold is a common issue, especially if there's too much moisture or not enough air circulation. To prevent this, ensure your trays have good drainage, avoid overwatering, and provide gentle air movement with a small fan once the greens are exposed to light. Our guide, Stop Mold on Microgreens: Your Guide to Healthy Harvests, offers more tips.
- Leggy Seedlings: If your microgreens are tall and thin, stretching towards the light, they are 'leggy.' This means they aren't getting enough light. Move your grow light closer to the tray or place your tray in a brighter spot. When choosing a light, consider what to look for in LED grow lights to ensure your plants get the right spectrum and intensity.
Most issues with easy microgreens are minor and simple to fix once you know what to look for. Don't be discouraged if your first batch isn't perfect. Each grow is a learning experience.
Final Thoughts
Growing the easiest microgreens to grow is a rewarding and accessible entry into the world of indoor gardening. With rapid growth cycles and delicious results, these small plants offer big satisfaction and fresh flavor for your kitchen. Enjoy your homegrown harvest!
Ready to explore more ways to grow fresh food indoors? Check out other MicroVeg guides for tips and inspiration.
Frequently Asked Questions
Can I grow microgreens without a grow light?
Yes, you can grow microgreens without a specialized grow light if you have a very bright, south-facing window that receives several hours of direct sunlight each day.
How often should I water microgreens?
Microgreens need consistent moisture. Mist them with a spray bottle once or twice daily, or water from the bottom by adding a small amount of water to the tray underneath the growing tray.
Can I harvest microgreens more than once?
Most microgreens are a 'cut and come again' crop only once, meaning you get one good harvest. Some varieties like peas might offer a small second flush, but it's generally best to replant for consistent yields.
What's the best temperature for growing microgreens?
Microgreens generally thrive in average room temperatures, between 65-75°F (18-24°C). Avoid extreme heat or cold, which can slow growth or encourage mold.
Explore More Microgreens Guides
 Microgreens
When to Harvest Microgreens: Your Guide to Perfect Timing
Learn the best time to harvest your microgreens for maximum flavor and nutrition, ensuring a perfect crop every time.
 Microgreens
Can You Regrow Pea Shoots After Harvesting?
Discover how to get multiple harvests from your pea shoots by using the right cutting technique for easy indoor growing.
 Microgreens
Stop Mold on Microgreens: Your Guide to Healthy Harvests
Learn how to prevent common mold issues on your microgreens for a safe and successful indoor harvest.