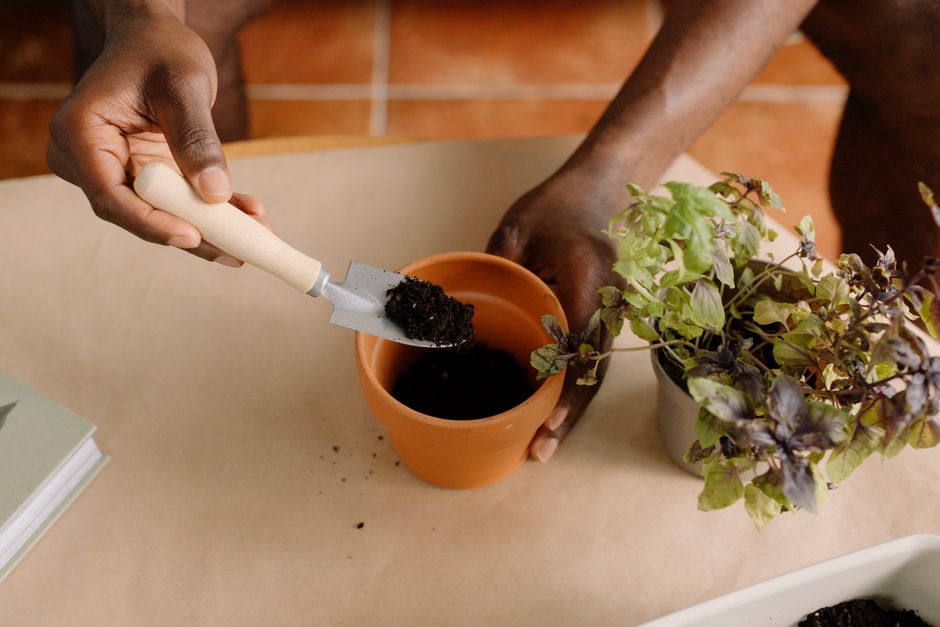
Propagate Mint Indoors: Grow New Plants Easily
Imagine having an endless supply of fresh, aromatic mint right in your kitchen. That dream is completely achievable when you learn how to propagate mint indoors. Propagating simply means creating new plants from an existing one, and mint is one of the easiest herbs to multiply. It is a fantastic skill for any home grower, allowing you to expand your herb garden without buying new plants.
This guide will walk you through everything you need to know to successfully propagate mint indoors. We'll cover taking cuttings, rooting them in water or soil, and caring for your new mint plants. Get ready to enjoy a constant harvest of this versatile herb.
Why Propagate Mint Indoors?
Propagating mint indoors is a simple, cost-effective way to multiply your favorite herb. It allows you to create new plants from existing ones, saving you money and ensuring you always have fresh mint on hand. Mint grows quickly, and propagation is a natural way to maintain healthy growth and prevent your original plant from becoming leggy.
It is also a great way to share your love of gardening with friends and family. A rooted mint cutting makes a thoughtful, living gift. Plus, it is incredibly satisfying to watch new roots and leaves emerge from a simple stem cutting.
What You'll Need to Propagate Mint Cuttings
To propagate mint cuttings successfully, you will need a few basic supplies that are likely already in your home. Having everything ready before you start makes the process smooth and enjoyable.
- A healthy, mature mint plant for cuttings
- Sharp, clean scissors or pruning shears
- A clear glass jar or small container for water rooting
- Small pots or seed-starting trays with drainage holes
- Good quality potting mix or seed-starting mix
- (Optional) Rooting hormone, though mint often roots well without it
Make sure your tools are clean to prevent any disease transmission to your new cuttings. A quick wipe with rubbing alcohol is usually enough.
How to Take Mint Cuttings for Propagation
Taking mint cuttings is the crucial first step to successful propagation. The goal is to select healthy stems and make clean cuts to give your new plants the best start.
Choosing the Best Stems
Look for healthy, vibrant stems that are at least 4-6 inches long and have several sets of leaves. Avoid any stems that show signs of flowering, disease, or pest damage. Younger, non-flowering stems tend to root more easily and produce stronger new plants.
Healthy stems are firm, not soft or flimsy. They should have a good green color without yellowing or spots. Choose a few more cuttings than you think you need, as not every cutting will always root successfully.
Making the Right Cut
Using your clean, sharp scissors, cut a stem just below a leaf node. A leaf node is where leaves grow out from the main stem, and it is where new roots are most likely to form. Your cutting should be about 4-6 inches long.
Once you have your cutting, remove the leaves from the bottom 2-3 inches of the stem. This prevents leaves from rotting in water or soil, which can introduce pathogens. Leave at least 2-3 sets of leaves at the top of the cutting to allow for photosynthesis.
Two Easy Ways to Root Your Mint Cuttings
You can root mint cuttings successfully in either water or soil, both offering reliable results for home growers. The choice often comes down to personal preference and what you have available.
Water Propagation Method
Water propagation is often the preferred method for beginners because you can visually track root development. It is exciting to watch those tiny white roots emerge.
- Place your prepared mint cuttings into a clean glass jar.
- Fill the jar with fresh, room-temperature water, ensuring the bottom 2-3 inches of the stems are submerged.
- Place the jar in a spot with bright, indirect sunlight. A windowsill that gets good light but not harsh direct sun is ideal.
- Change the water every 1-2 days to keep it fresh and prevent bacterial growth.
- Within 1-2 weeks, you should start to see small white roots forming. Once the roots are about 1-2 inches long, your cuttings are ready to be transplanted into soil.
Remember to handle the delicate new roots gently during transplanting. Moving them to soil too soon or too late can stress the plant.
Soil Propagation Method
Rooting mint directly in soil is another effective method, often resulting in less transplant shock later on. This method can feel a bit more hands-off once the cuttings are planted.
- Fill small pots or a seed-starting tray with a moist, well-draining potting mix.
- If using rooting hormone, dip the cut end of each mint cutting into the hormone powder or gel, shaking off any excess.
- Make a small hole in the soil with your finger or a pencil.
- Gently insert the bottom 2-3 inches of each cutting into the soil.
- Lightly firm the soil around the base of the cutting to ensure good contact.
- Water thoroughly, but do not overwater. The soil should be consistently moist, not soggy.
- Cover the pots with a clear plastic dome or plastic wrap to create a mini-greenhouse effect, which helps maintain humidity.
- Place the pots in bright, indirect light. Check the soil moisture daily and mist the leaves occasionally if they seem dry.
- After 2-3 weeks, gently tug on a cutting. If you feel resistance, it has rooted.
Once rooted, you can remove the plastic cover and continue to care for your new mint plants as you would a mature plant.
Caring for Your New Mint Plants
Once your mint cuttings have rooted and are established in soil, providing consistent care will help them thrive. New mint plants need plenty of light, consistent moisture, and comfortable temperatures.
Place your potted mint in a spot that receives at least 6 hours of bright, indirect light per day. If natural light is insufficient, consider using a grow light. Setting your LED grow light schedule correctly can make a big difference for indoor herbs. Always keep electrical timers and grow lights away from water to prevent accidents.
Keep the soil consistently moist, but never waterlogged. Mint does not like to dry out completely, but sitting in soggy soil can lead to root rot. Water when the top inch of soil feels dry to the touch. Indoor mint prefers temperatures between 65-70°F (18-21°C).
Begin fertilizing lightly with a balanced liquid fertilizer once your plants show new growth, following the dosage instructions on your nutrient bottle. Pruning regularly, by pinching back the top leaves, will encourage bushier growth and prevent your mint from becoming leggy.
Final Thoughts
Learning how to propagate mint indoors is a rewarding skill that keeps your kitchen stocked with fresh herbs year-round. Whether you choose water or soil methods, you will soon have thriving new plants ready for harvesting. With a little care, your indoor mint garden will flourish. Explore more MicroVeg guides for additional tips on growing your favorite greens.
Frequently Asked Questions
How long does it take for mint cuttings to root?
Mint cuttings typically begin to show roots within 1-2 weeks when propagated in water, and establish in soil within 2-3 weeks.
Can you propagate mint without rooting hormone?
Yes, mint is one of the easiest herbs to propagate, and it roots very readily in water or soil without the need for rooting hormone.
When is the best time to take mint cuttings?
You can take mint cuttings at any time of year when the plant is actively growing, but spring and summer often yield the fastest results.
Why are my mint cuttings turning yellow?
Mint cuttings may turn yellow due to insufficient light, old water that needs changing, or a lack of nutrients if left in water too long without transplanting.
Explore More Plant Care Guides
 Plant Care
Crown Imperial Indoors: Can This Showstopper Thrive?
Learn if the magnificent Crown Imperial can truly thrive in your indoor container garden or on your balcony, and what challenges you might face.
 Plant Care
Christmas Cactus Bloom: 3 Secrets for Indoor Growers
Learn the simple, practical secrets to make your Christmas cactus bloom beautifully indoors, turning your home into a festive display.
 Plant Care
Prevent Algae in Hydroponics: Your Guide to Clean Systems
Discover simple, effective strategies to prevent algae in hydroponics and keep your indoor gardening system clean and your plants thriving.