How to Start Seeds for Hydroponics: Easy Beginner Guide
Starting an indoor garden without soil can feel intimidating at first, but germinating your own crops is surprisingly straightforward. To start seeds for hydroponics successfully, you sow seeds into an inert, soil-free starter plug such as rockwool or coco plugs, keep the medium moist and warm until sprouts emerge, and then introduce gentle lighting before transferring the young root systems into your main water reservoir.
Using regular potting soil will clog pumps and foul up water lines, so soil-free methods are essential for clean indoor systems. With a few simple tools and good daily habits, you can sprout healthy greens, herbs, and fruiting crops right on your countertop.
What is the best medium to start seeds for hydroponics?
The best medium to start seeds for hydroponics is an inert starter plug, such as rockwool cubes, rapid rooter plugs, or coco coir pellets. These soil-free materials hold the ideal balance of moisture and oxygen around tiny seeds while keeping your water system clean.
Rockwool cubes are spun mineral fibers that hold moisture reliably. Peat and polymer plugs, often called rapid rooters, are pre-formed sponges made from composted organic bark and peat that make dropping seeds into place very easy. Coco coir plugs are made from shredded coconut husks and offer excellent aeration for delicate roots.
Preparing your starter plugs before sowing
Always pre-soak your starter medium in clean, pH-balanced water before adding seeds. Rockwool in particular is naturally alkaline right out of the package, so giving it a quick soak in water adjusted according to a guide on how to adjust hydroponic pH helps bring the cube into a friendly range for germination.
Shake off any dripping excess water rather than squeezing the plugs tightly. Squeezing compressed cubes damages the internal air pockets that new roots rely on for oxygen.
How to start seeds for hydroponics step by step
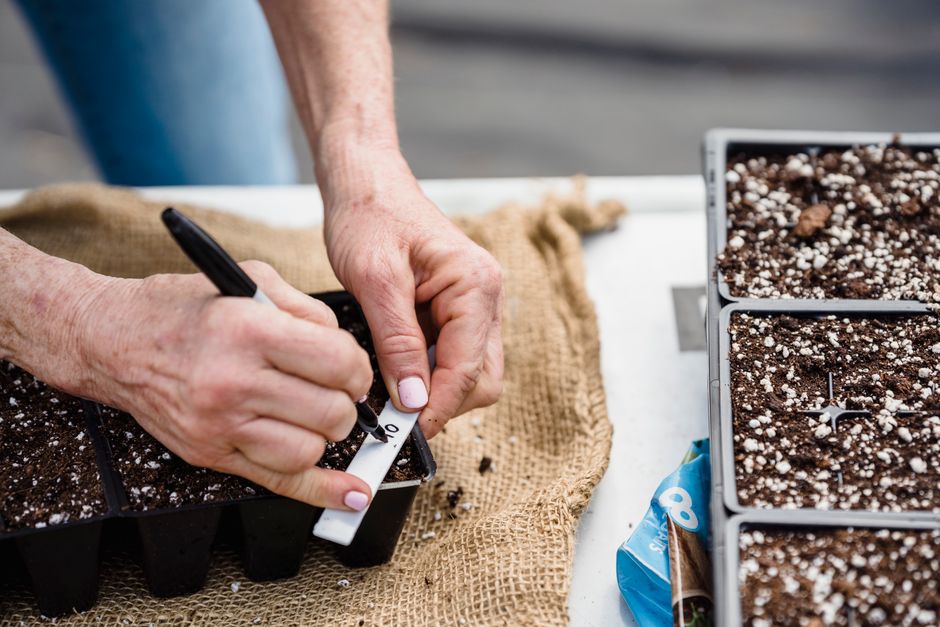
To start seeds for hydroponics, place your moistened starter plugs in a shallow nursery tray, drop one to three seeds into each hole, and cover the tray with a clear humidity dome. Place the tray in a warm spot away from direct drafts until the first green shoots break through the surface.
Follow these simple steps for reliable germination:
- Soak your starter plugs in plain, conditioned water until fully saturated, then place them into a clean seed flat or drainage tray.
- Place one to three fresh seeds into the center hole of each plug. Use tweezers or a moistened toothpick to make handling tiny seeds like lettuce or basil easier.
- Pinch the top of the plug gently or tear off a tiny fleck of the plug material to cover the seed hole, protecting the seed from drying out while keeping light away from seeds that need darkness to sprout.
- Cover the entire tray with a clear plastic humidity dome to trap ambient moisture around the plugs.
- Keep the tray in a consistently warm area. If your room runs cool, learn how to use a seedling heat mat under the tray to provide gentle bottom warmth that speeds up germination.
Check the tray every single day. As soon as you spot green stems rising above the plugs, remove the humidity dome completely so fresh air can circulate and prevent damping off.
When should you give hydroponic seedlings light and nutrients?
Hydroponic seedlings need light the moment their green shoots emerge from the starter plugs, but they do not need added nutrients until they grow their first set of true leaves. Providing light immediately stops seedlings from stretching and turning floppy.
Place your tray directly beneath your indoor lighting fixture as soon as the sprouts appear. Checking your LED grow light spectrum ensures you are giving young plants the cool, blue-heavy light that encourages stocky, compact stems instead of thin, leggy growth.
Managing moisture and humidity domes
Young sprouts need damp plugs, but they should never sit in a deep pool of standing water. Add just enough water to the bottom of the tray so the plugs draw moisture upward from the bottom, then tip out any standing pools after twenty minutes.
Once the seeds have sprouted and the dome is removed, misting is usually unnecessary. Instead, bottom-water the tray whenever the top of the plug feels slightly dry to the touch.
Common mistakes when starting hydroponic seeds
The most common mistake when starting hydroponic seeds is feeding full-strength liquid fertilizer to tender seedlings before their root systems can handle the minerals. Seeds carry all the stored energy they need to sprout and grow their initial cotyledons.
Watch out for these frequent beginner errors:
- Adding strong nutrient mixes on day one, which burns tiny root tips and stunts early growth.
- Leaving the humidity dome on after germination, which traps stagnant, humid air and breeds fungal stem rot.
- Letting rockwool or peat plugs dry out completely between waterings, which kills fragile new taproots within hours.
- Sowing too many seeds in one plug without thinning the weaker sprouts later.
- Placing lighting fixtures too far away from the tray, causing sprouts to stretch upward into weak, spindly stems.
When your seedlings develop their first true leaves, consult a reference on when to fertilize seedlings to introduce a very weak, diluted nutrient solution safely.
How to transplant seedlings into your hydroponic system
You can transplant seedlings into your main hydroponic system once healthy white roots poke out from the sides and bottom of the starter plug. This root growth shows the plant is ready to draw moisture and nutrients directly from your reservoir.
Place the entire starter plug directly into a plastic net cup. Gently backfill around the plug with rinsed clay pebbles or expanded clay balls to hold the seedling upright, making sure not to crush or tear any exposed roots. Position the net cup in your system so the bottom of the cup touches the nutrient solution or catches the spray from your pump.
Always keep electrical cords, timers, and air pumps elevated and away from reservoir water spills during transplanting to prevent accidental shocks or equipment damage. Once settled into the net cups, your plants will quickly adjust to their permanent home.
Final Thoughts
Learning how to start seeds for hydroponics gives you complete control over your indoor food supply from day one. By choosing the right soil-free starter medium, maintaining steady moisture, and providing bright light the moment sprouts appear, you set your indoor crops up for fast, abundant growth. Explore our other guides on MicroVeg to learn how to manage your nutrients, clean your equipment, and build high-yielding indoor gardens.
Frequently Asked Questions
Can you start seeds directly in hydroton clay pebbles?
Clay pebbles dry out too quickly and leave large air gaps, so it is best to sprout seeds in rockwool or peat plugs first before placing them into clay pebbles.
How long does it take for hydroponic seeds to sprout?
Most common vegetables and herbs sprout within three to ten days when kept at consistent room temperature and high humidity.
Do hydroponic seeds need darkness to germinate?
Most vegetable seeds sprout best in darkness or covered with plug material, but they require immediate bright light the moment green stems break through.
Can you use seeds from regular seed packets for hydroponics?
Yes, any standard garden seed packet works in hydroponics as long as you start them in a soil-free medium rather than garden soil.
Explore More Hydroponics Guides
 Hydroponics
Kratky vs Deep Water Culture: Which Hydroponic System is Right?
Choosing between Kratky and Deep Water Culture (DWC) hydroponics depends on your space, budget, and how hands-on you want to be.
 Hydroponics
How Often Should You Change Hydroponic Water?
Regularly refreshing your hydroponic nutrient reservoir is crucial for plant health, preventing imbalances, algae, and root diseases.
 Hydroponics
Set Up Your Basic Hydroponic System: A Beginner's Guide
Learn how to easily set up a basic hydroponic system at home and start growing fresh plants without soil, even if you are a complete beginner.