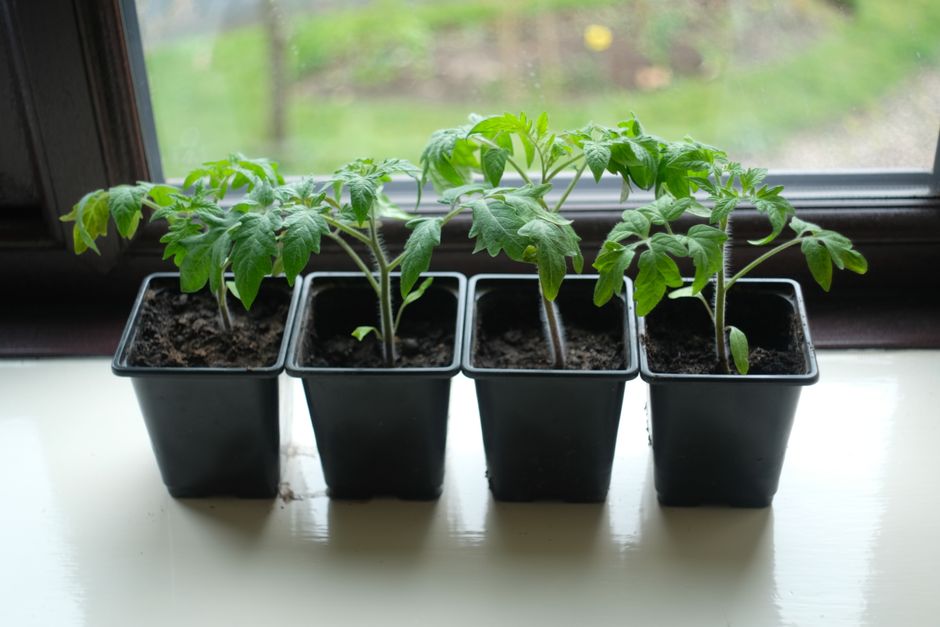
How to Use a Seedling Heat Mat: Easy Indoor Guide
Learning how to use a seedling heat mat is one of the easiest ways to speed up seed germination for your indoor garden. A seedling heat mat is a flat waterproof heating pad designed to gently warm soil from below, creating the warm moisture environment seeds need to sprout faster. By raising root zone temperatures slightly above ambient room conditions, it helps tender seeds germinate reliably during cold seasons.
Starting seeds indoors during winter or early spring often comes with a major challenge. Room temperatures in cold homes can fall below the ideal range for seed germination, causing seeds to sit in damp soil for weeks without sprouting. Cold soil delays sprouting and can cause seeds to rot in soggy starter mixes before they ever break the surface. Heat mats solve this problem by supplying steady bottom warmth directly to your seed trays.
Why Should You Use a Seedling Heat Mat for Indoor Gardening?
You should use a seedling heat mat because warm soil triggers faster, more consistent seed germination indoors. Warmth speeds up chemical activity inside the seed shell, encouraging rapid root development and strong early sprouts. Most warm-season crops like tomatoes, peppers, basil, and eggplants sprout much faster when bottom heat is applied.
Without added heat, seeds can take up to three weeks to germinate in a chilly room. That long wait increases the risk of fungal issues like soil rot or mold growth on your seed starter mix. Adding gentle heat speeds up germination time significantly, often cutting wait times in half. This head start helps you build a stronger, healthier indoor crop calendar.
Consistent root warmth also yields higher germination rates across your entire seed tray. Instead of seeds sprouting sporadically over several weeks, bottom heat encourages seeds to pop up together at the same time. This uniformity makes seedling care much easier, since all your sprouts will be ready for grow lights and feeding at the same stage of growth.
How to Use a Seedling Heat Mat Step by Step
To use a seedling heat mat properly, place the mat on a flat dry surface, set your seed starter tray directly on top, and plug the unit into a reliable power outlet. Keep the mat turned on continuously until seeds germinate, making sure soil stays moist but not waterlogged throughout the process.
Begin by setting up your workspace in a clean location with easy access to electricity. Unroll your heating pad and lay it completely flat on your work table. Next, moisten your seed starter mix thoroughly before filling your cell trays or soil blocks. Insert your seeds according to packet directions, press them down gently, and place your cell tray on a water catch tray before setting it on top of the heat mat.
Cover your seed tray with a clear plastic humidity dome to trap moisture around the seeds. Plug the heat mat into your outlet and leave it running around the clock. Check on your trays daily to monitor soil moisture levels and watch for the very first green sprouts breaking through the surface soil.
Choosing the Right Surface and Location
Place your mat on a hard heat-resistant surface like a wooden workbench, sturdy shelf, or insulated table. Avoid cold granite counter tops, metal shelves, or bare concrete floors because cold surfaces draw heat downward away from your seed trays and reduce mat efficiency. You can place a thin piece of foam board or cardboard beneath the heat mat to insulate it against cold surfaces.
Always place a sturdy drip tray under your seed cells so drainage water never touches the electrical pad. As a safety note, keep electrical cords and plugs raised off the floor and away from standing water or accidental tray spills to prevent short circuits. Keep electrical connections clean, dry, and anchored away from traffic areas where people or pets might trip over them.
What Temperature Should a Seedling Heat Mat Be?
A seedling heat mat should warm soil to roughly 10 to 15 degrees Fahrenheit above ambient room temperature for optimal germination. Most standard seedling heat mats operate at a fixed output, gently warming the soil without scorching sensitive seeds or drying out tender root tips.
Standard heat mats without variable controls raise soil warmth steadily above room conditions. If your room is comfortable for adults, a basic heat mat will gently bring soil temperatures into the ideal range for most household vegetables and herbs. Different plant species have unique preferences, so checking your seed packet recommendations is always a wise first step.
Using a Thermostat Controller for Better Results
Connecting your heat mat to a digital thermostat controller gives you precise control over root zone conditions. You place a small temperature probe inside the soil mix, and the controller turns the heat mat on or off to keep conditions steady. Warm-season crops like peppers and tomatoes enjoy warmer soil, while cool-season crops prefer milder conditions.
A thermostat prevents overheating on warmer days when ambient room temperatures naturally rise. Overheating can bake delicate seed embryos or dry out soil trays before you notice. Using a temperature controller ensures your seeds stay in their sweet spot day and night without manual adjustments.
When to Remove a Seedling Heat Mat After Germination
You should remove your seedling heat mat as soon as half of your seeds have sprouted and exposed their first leaves above the soil. Leaving young plants on constant bottom heat after germination leads to weak stems and overgrown top growth.
Once seeds sprout, their growing priorities change completely. Roots no longer require warm bottom stimulation to jumpstart life, but stems and leaves immediately need bright light and fresh airflow. Leaving seedlings on a warm mat accelerates top growth faster than roots can support, causing tall weak plants that fall over easily.
Move your sprouted trays directly under indoor grow lights as soon as you turn off the heat mat. If your young sprouts start looking pale or weak, check our guide on why seedlings turn yellow to fix light or moisture imbalances quickly. Excess heat after sprouting can dry out delicate roots rapidly, so switching off bottom heat keeps growth steady and manageable.
Common Seedling Heat Mat Mistakes to Avoid
The most common seedling heat mat mistake is letting the soil starter mix dry out completely while bottom heat is active. Bottom warmth accelerates evaporation, meaning your seed trays can dry out twice as fast as trays sitting at regular room temperature.
To avoid underwatering or overwatering mistakes, follow these simple guidelines during seed germination:
- Check soil moisture every morning and evening by lightly touching the top of the soil mix.
- Water trays gently from the bottom or use a spray bottle to avoid disturbing small seeds.
- Remove humidity domes immediately once sprouts emerge to allow proper air movement.
- Never submerge your heat mat in water or place seed trays without a drip catch tray directly on top.
Another common error is leaving humidity domes on tight after seeds sprout. Trapped warmth and high moisture create ideal conditions for fungal diseases like damping off, which collapses young stem tissues near the soil line. Ventilation is critical as soon as leaves appear. Once your seedlings outgrow their starter cells, you can learn when to pot up seedlings into larger containers for continued indoor success.
Final Thoughts
Knowing how to use a seedling heat mat takes the guesswork out of indoor seed starting and gets your garden off to a fast start. Warm soil gives weak seeds the push they need to germinate evenly and build strong early root systems. Once sprouts appear, turn off your mat, provide strong light, and keep soil moisture steady. For more practical indoor growing advice, explore our other MicroVeg guides today!
Frequently Asked Questions
Do you leave a seedling heat mat on 24 hours a day?
Yes, leave your seedling heat mat turned on continuously 24 hours a day until seeds sprout. Continuous warmth keeps soil temperatures stable and prevents germination delays.
Can you place seed trays directly on a heat mat?
Yes, you can place seed trays directly on top of a seedling heat mat as long as the mat is waterproof and designed for indoor seed starting. Always use a solid catch tray underneath your seed cells to catch excess water.
Do seeds need light while on a heat mat?
Most seeds do not require light to germinate while on a heat mat because they are buried under soil. However, as soon as green sprouts break through the surface, you must immediately turn on indoor lights.
Will a heat mat dry out seedling soil?
Yes, a seedling heat mat speeds up evaporation, causing soil moisture levels to drop quickly. Check your seed trays daily and mist or bottom water to keep soil evenly damp.
Explore More Plant Care Guides
 Plant Care
Pruning Chrysanthemums for Longer Indoor Blooms
Discover effective pruning techniques for chrysanthemums to ensure more vibrant and continuous blooms in your indoor garden.
 Plant Care
How to Grow Spinach Indoors: Fresh Leaves Year-Round
Learn how to grow fresh spinach indoors all year long, perfect for small spaces and a continuous harvest.
 Plant Care
Indoor Chrysanthemum Care: Avoid This Common Mistake
Bringing chrysanthemums indoors for fall decor is popular, but many home growers make a key mistake that causes these vibrant plants to quickly decline.