How to Thin Seedlings: Simple Step-by-Step Guide
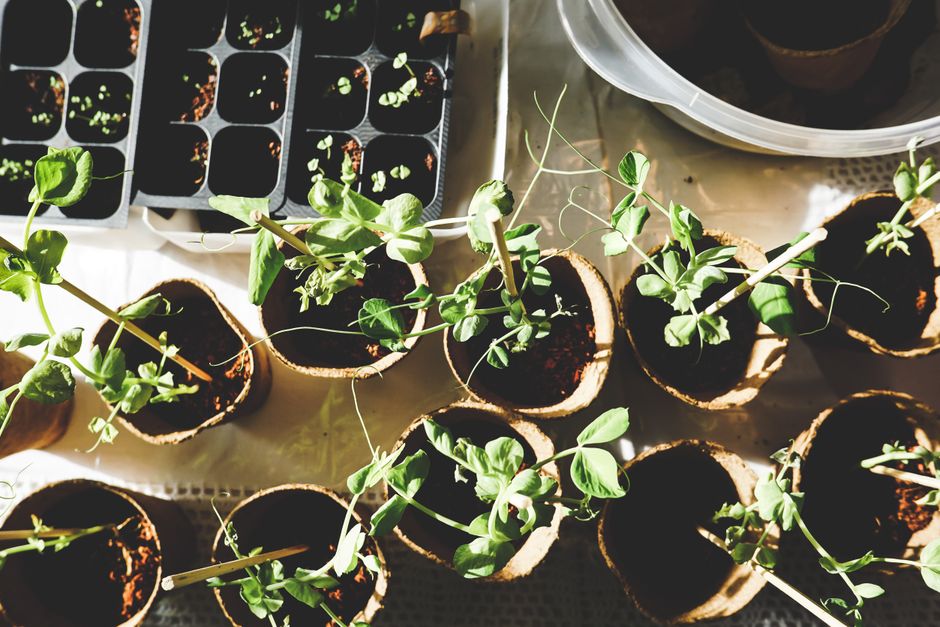
You sowed extra seeds in each seed tray cell to guarantee germination, and now several tiny green shoots are crowding each other out. Knowing how to thin seedlings is an essential step to prevent overcrowding and give your strongest plants room to thrive. In this guide, you will learn why thinning matters, when to do it, and the easiest step-by-step method to protect your indoor crops.
Why Should You Thin Indoor Seedlings?
You should thin indoor seedlings because crowded plants compete directly for light, water, and soil nutrients, which quickly leads to weak growth. When multiple sprouts share a single small cell, their stems stretch out and their roots become tightly tangled together. This intense competition weakens every plant in the cell rather than allowing one to grow strong.
Proper spacing gives a single plant full access to the root zone and room to expand its foliage. A sprout that grows without competition builds a thick stem, sturdy branch structure, and deep roots that transition smoothly into larger pots or hydroponic net cups. If you leave crowded sprouts together, none of them will produce good yields.
Learning how to thin seedlings also improves air circulation around the base of your young plants. Stagnant air and excessive moisture between crowded stems encourage fungal diseases like damping off, which can wipe out entire trays overnight. Thinning creates clean spacing that allows air to move freely around each stem.
What Happens If You Skip Thinning?
Skipping this step causes your sprouts to grow tall, thin, and floppy as they race upward to steal light from nearby plants. These crowded stems lack structural strength and easily fall over under their own weight or during watering. The tangled roots will also starve each other of oxygen, leading to stunted plants that never recover.
When Is the Best Time to Thin Seedlings?
The best time to thin seedlings is when they develop their first set of true leaves, which usually appear shortly after the initial seed leaves unfold. The very first pair of leaves to emerge are called cotyledons, which provide stored energy from the seed. True leaves sprout directly above the cotyledons and match the distinctive shape of the mature plant leaves.
Waiting for true leaves ensures that each sprout has developed enough to show its health and potential. If you try to thin too early when only seed leaves are visible, you might remove a plant that would have grown strong or keep a plant that turns out weak. True leaves give you a clear visual clue about which seedling is thriving.
Check your indoor seedling trays daily under your lights. Once most sprouts show two distinct sets of leaves, it is time to thin them. Do not delay this task, because root systems expand quickly below the surface and become harder to separate without causing damage.
How to Thin Seedlings Step by Step
To thin seedlings correctly, cut unwanted sprouts at soil level using sharp micro-snips instead of pulling them out by hand. Pulling sprouts by hand disturbs the delicate soil structure and often tears the fragile root threads of the keeper plant. Follow these simple steps to thin your indoor trays cleanly.
Step 1: Identify the Strongest Plant
Look closely at each individual cell under clear lighting. Choose the single sprout that exhibits the thickest stem, darkest green color, and most upright shape. Pass over sprouts that are leaning sharply, showing pale yellow foliage, or growing noticeably slower than the rest of the group.
Step 2: Snip Unwanted Sprouts at the Base
Take a small pair of clean precision scissors or micro-snips. Always wipe your tool blades with rubbing alcohol before starting, as clean blades stop the spread of potential plant pathogens. Hold the top of the weaker sprout gently between your fingers and snip the stem right at the soil surface.
Keep these best practices in mind while working through your indoor trays:
- Use sharp snips or small scissors rather than pulling stems with your fingers.
- Cut stems flat against the top of the soil or grow plug surface.
- Select the sprout with the thickest stem and straightest vertical growth as your keeper.
- Rinse and eat edible thinned sprouts like radish, broccoli, or basil as fresh micro-greens.
- Never yank stems upward, because pulling tears fine root hairs under the soil.
Safety should always come first when working around indoor grow setups. Keep all liquid containers and plant sprayers far away from power strips, timers, and grow light ballast cords to prevent electrical hazard spills.
Can You Replant or Transplant Thinned Seedlings?
You can replant thinned seedlings if you separate them carefully while they are small, but trimming them with scissors is much safer for your main crop. Attempting to rescue extra sprouts requires digging into the root zone, which almost always disrupts the roots of the plant you want to preserve.
If you want to save extra seedlings, start by thoroughly moistening the soil to make separation easier. Gently slide a toothpick or butter knife into the soil beneath the sprout to pry the small root ball upward. Never pull directly on the stem, because tender stems crush or snap under slight pressure. Hold the sprout gently by one of its sturdy seed leaves instead.
Place the extra sprout into a fresh pot filled with damp starter mix or a moist rockwool cube. Keep the newly potted seedling out of direct light for twenty-four hours while its roots adjust to the new media. If you enjoy growing culinary crops indoors, take a look at our guide on how to grow cilantro indoors for more hands-on herbs tips.
How Thinning Differs for Hydroponics vs Soil
Thinning seedlings in hydroponic plugs requires extra care because hydroponic starter media like rockwool, coco coir, or peat plugs retain moisture and allow rapid root binding. In these dense plugs, root systems intertwine quickly, making pulling sprouts even more destructive than in loose soil.
Never pull seedlings out of a hydroponic plug. Always snip unwanted stems flush with the top of the plug so the remaining root system can take over the entire plug volume without interference. The dead root material from the snipped sprout will simply break down naturally inside the plug without harming your living plant.
Once your thinned plants establish deep roots, you can choose the best crops for your system with our guide to the best hydroponic plants for beginners. Proper early thinning ensures each net pot hosts one dominant plant capable of heavy nutrient uptake and vigorous indoor growth.
Final Thoughts
Knowing how to thin seedlings gives your indoor garden the best setup for strong stems, deep root systems, and productive yields. Taking a few minutes to trim extra sprouts with sharp snips preserves root health and sets your remaining plants up for success. Explore more MicroVeg guides to refine your skills with indoor grow lights, hydroponics, and small-space garden techniques.
Frequently Asked Questions
Is thinning seedlings really necessary?
Yes, thinning seedlings is necessary because crowded sprouts compete for space, light, and soil nutrients. Leaving crowded seedlings leads to weak stems and poor harvests.
Should I pull or cut thinned seedlings?
You should cut thinned seedlings at soil level using clean micro-snips. Pulling them out by hand can easily tear the delicate roots of nearby plants.
Can I eat thinned seedlings?
Yes, thinned seedlings of edible crops like lettuce, radish, cilantro, and basil can be eaten like fresh microgreens. Simply rinse them with clean water before serving.
What should I do after thinning seedlings?
After thinning, give the remaining seedlings a gentle watering and keep them under steady light. This helps the selected plant build a thick stem and healthy roots.
Explore More Plant Care Guides
 Plant Care
Pruning Chrysanthemums for Longer Indoor Blooms
Discover effective pruning techniques for chrysanthemums to ensure more vibrant and continuous blooms in your indoor garden.
 Plant Care
How to Grow Spinach Indoors: Fresh Leaves Year-Round
Learn how to grow fresh spinach indoors all year long, perfect for small spaces and a continuous harvest.
 Plant Care
Indoor Chrysanthemum Care: Avoid This Common Mistake
Bringing chrysanthemums indoors for fall decor is popular, but many home growers make a key mistake that causes these vibrant plants to quickly decline.