Pickled Cherry Tomatoes: Easy Quick Pickle Recipe
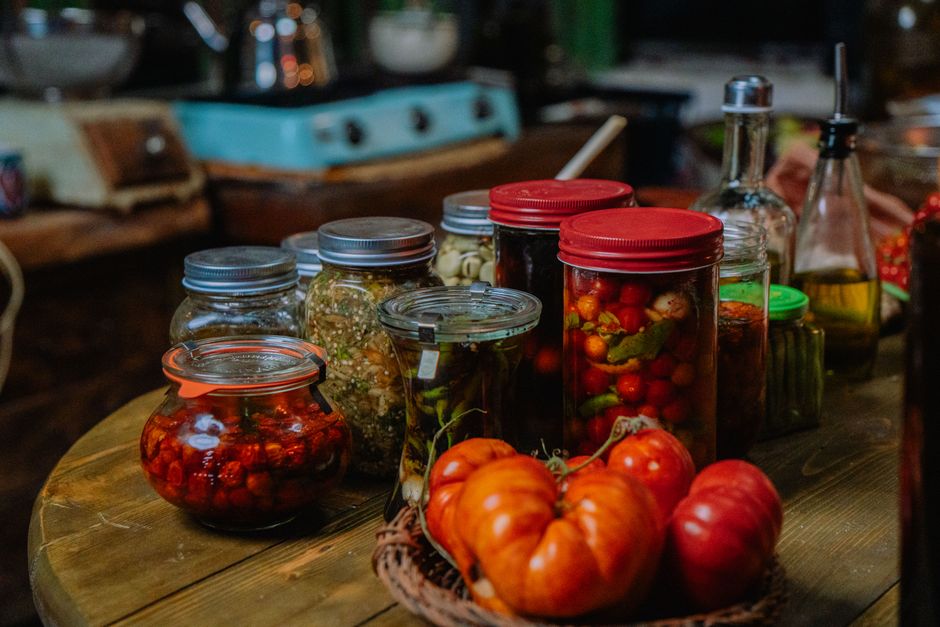
If you grow cherry tomatoes in a home tent, indoor garden, or balcony container, you know how quickly small fruits ripen all at once. Making pickled cherry tomatoes is one of the easiest ways to preserve an extra harvest without spending hours over a hot stove. Pickled cherry tomatoes are fresh cherry tomatoes preserved in a quick vinegar brine with garlic, herbs, and spices without heat canning. They offer a sweet, tangy bite that turns an extra garden harvest into a delicious snack or salad topping that lasts for weeks in your refrigerator.
What Are Quick Pickled Cherry Tomatoes?
Quick pickled cherry tomatoes are un-canned tomatoes soaked in a seasoned vinegar brine and stored in the refrigerator. They do not require hot water bath canning, which keeps the tomatoes firm and fresh.
Traditional canning methods boil glass jars to make produce shelf stable at room temperature. Boiling delicate cherry tomatoes often turns their skins mushy and breaks down their soft inner pulp. Refrigerator pickling preserves the structural skin and keeps that satisfying pop when you bite into one.
Indoor and small space growers benefit greatly from quick pickling because harvests usually arrive in small, continuous batches. You do not need bushels of produce to make a batch of pickles. You can fill a single glass jar whenever your indoor setup yields a handful of ripe fruit.
How Do You Prepare Cherry Tomatoes for Pickling?
You prepare cherry tomatoes for pickling by washing them thoroughly, patting them dry, and poking a small hole in each tomato with a toothpick or skewer. Piercing the skin allows the vinegar brine to penetrate deep inside without causing the tomatoes to burst.
Selection is the most important step in preparing your crop. Choose tomatoes that are fully colored but still firm when squeezed gently. Overripe tomatoes will soften too fast in the liquid, while underripe green ones will lack sweet flavor. If you start your plants indoors under a specialized LED grow light spectrum, you can often pick fruit at the ideal stage of ripeness year round.
If you grew your crop from seed in small starter cells, knowing when to pot up seedlings gives your indoor tomato plants room to build strong root systems that support abundant, firm fruit.
How Piercing Keeps Tomatoes Firm
Cherry tomato skins are tough enough to block liquid from entering the fruit naturally. If you place un-pierced tomatoes into a jar of brine, the vinegar stays on the outside and the flesh remains plain. Poking each tomato once or twice creates a tiny vent. This vent lets the seasoned liquid flow inside while keeping the outer skin intact when warm brine covers it.
As a basic safety note, always wash your garden vegetables thoroughly under cool running water before processing to remove dust, soil, or organic residues.
What Brine Ratio Works Best for Pickling Cherry Tomatoes?
The best quick pickling brine ratio uses equal parts water and vinegar combined with salt and a touch of sugar. Equal amounts of water and vinegar create a balanced acid level that preserves flavor while keeping the taste pleasantly tart.
The liquid base relies on clear vinegar with at least five percent acidity. White distilled vinegar provides a sharp, clean bite that highlights the natural flavor of the fruit. Apple cider vinegar adds a subtle fruity sweetness that pairs nicely with dark or red tomato varieties. Avoid low acid specialty vinegars, as they might not preserve the tomatoes effectively.
Salt and sweetener balance the sharp vinegar profile. Kosher salt or pickling salt works best because it dissolves smoothly without turning the brine cloudy. Table salt contains anti-caking agents that can leave sediment at the bottom of your glass jar. A small amount of white sugar or honey softens the acid without making the brine taste sugary.
Gather these basic ingredients on your kitchen counter before starting:
- One cup of distilled white vinegar or apple cider vinegar
- One cup of filtered water
- One tablespoon of kosher salt
- One tablespoon of granulated sugar
- Two fresh garlic cloves, peeled and smashed
- Fresh herbs like dill sprigs, thyme, or basil leaves
- One teaspoon of whole black peppercorns
How to Make Pickled Cherry Tomatoes Step by Step
To make quick pickled cherry tomatoes, pack pierced tomatoes and aromatics into a clean jar, heat the vinegar brine until salt dissolves, pour the liquid over the tomatoes, and chill in the fridge. The tomatoes will be ready to eat after resting in the refrigerator for 24 hours.
Making these tangy treats takes less than fifteen minutes of active prep time. Follow these simple steps to make your own batch at home:
Step by Step Quick Pickling Steps
- Clean a glass pint jar and lid with warm soapy water and dry thoroughly.
- Place garlic cloves, peppercorns, and fresh herbs into the bottom of the glass jar.
- Pierce each clean tomato with a toothpick and pack them firmly into the jar, leaving half an inch of space at the top.
- Combine vinegar, water, salt, and sugar in a small saucepan over medium heat until the salt and sugar dissolve completely.
- Pour the warm brine over the tomatoes until they are submerged, place the lid tightly on the jar, and let it cool on the counter before moving it to the refrigerator.
Allow the jar to sit in the refrigerator for at least 24 hours before eating. This waiting time lets the spices infuse into the flesh of the tomatoes. Keep the jar chilled in the fridge, where the pickles will stay fresh and flavorful for up to four weeks.
How Should You Serve Refrigerator Pickled Cherry Tomatoes?
Pickled cherry tomatoes taste best when served cold or at room temperature in fresh green salads, on charcuterie boards, or as a tangy snack straight from the jar. You can also press them onto grilled bread with fresh cheese or toss them into pasta dishes.
These tangy bites add a bright burst of acidity to rich foods. Serve them alongside grilled meats, roasted vegetables, or sharp cheeses like feta and goat cheese. You can drop them into grain bowls or use them as a colorful garnish for sandwiches and burgers.
If you grow microgreens in tray setups indoors, try combining your pickled tomatoes with spicy mustard microgreens or crunchy radish shoots. The combination of peppery greens and vinegary tomatoes creates a high quality salad right from your home garden harvest.
Final Thoughts
Making pickled cherry tomatoes is the most satisfying way to turn an indoor or small space harvest into a long lasting, flavorful snack. With simple kitchen staples and a single jar, you can store your fresh garden produce for weeks without hot canning equipment. Explore our other guides on MicroVeg to learn more indoor growing tips and harvest recipes.
Frequently Asked Questions
How long do pickled cherry tomatoes last in the fridge?
Pickled cherry tomatoes remain fresh in the refrigerator for up to four weeks when kept sealed in an airtight glass jar completely submerged in brine.
Why do you pierce cherry tomatoes before pickling?
Piercing cherry tomatoes creates a small vent that lets the brine enter the fruit while preventing the skin from bursting when warm liquid is poured over them.
Can you pickle cherry tomatoes without sugar?
Yes, you can pickle cherry tomatoes without sugar. Sugar is optional in quick pickling recipes and is used primarily to balance the sharp acidity of the vinegar.
Do you need to peel cherry tomatoes before quick pickling?
No, you do not need to peel cherry tomatoes before quick pickling. The outer skins soften naturally in the vinegar solution while keeping the individual tomatoes intact.
Explore More Plant Care Guides
 Plant Care
Pruning Chrysanthemums for Longer Indoor Blooms
Discover effective pruning techniques for chrysanthemums to ensure more vibrant and continuous blooms in your indoor garden.
 Plant Care
How to Grow Spinach Indoors: Fresh Leaves Year-Round
Learn how to grow fresh spinach indoors all year long, perfect for small spaces and a continuous harvest.
 Plant Care
Indoor Chrysanthemum Care: Avoid This Common Mistake
Bringing chrysanthemums indoors for fall decor is popular, but many home growers make a key mistake that causes these vibrant plants to quickly decline.